
diff options
Diffstat (limited to 'content/blog')
| -rw-r--r-- | content/blog/2024-03-13-doom-emacs.md | 340 | ||||
| -rw-r--r-- | content/blog/2024-03-15-self-hosting-ddns-updater.md | 309 |
2 files changed, 649 insertions, 0 deletions
diff --git a/content/blog/2024-03-13-doom-emacs.md b/content/blog/2024-03-13-doom-emacs.md new file mode 100644 index 0000000..53859a9 --- /dev/null +++ b/content/blog/2024-03-13-doom-emacs.md @@ -0,0 +1,340 @@ ++++ +date = 2024-03-14T16:19:23+00:00 +title = "Doom Emacs & Org-Mode" +description = "A quick look at my setup with Doom Emacs and the Org-Mode syntax." ++++ + +## Screenshots + +These screenshots are showing a project opened with projectile, a treemacs side +pane open with the project contents, multiple buffers tiled next to each other, +and the help pane open at the bottomm. + +The themes are `doom-homage-white` and `doom-homage-black`. + +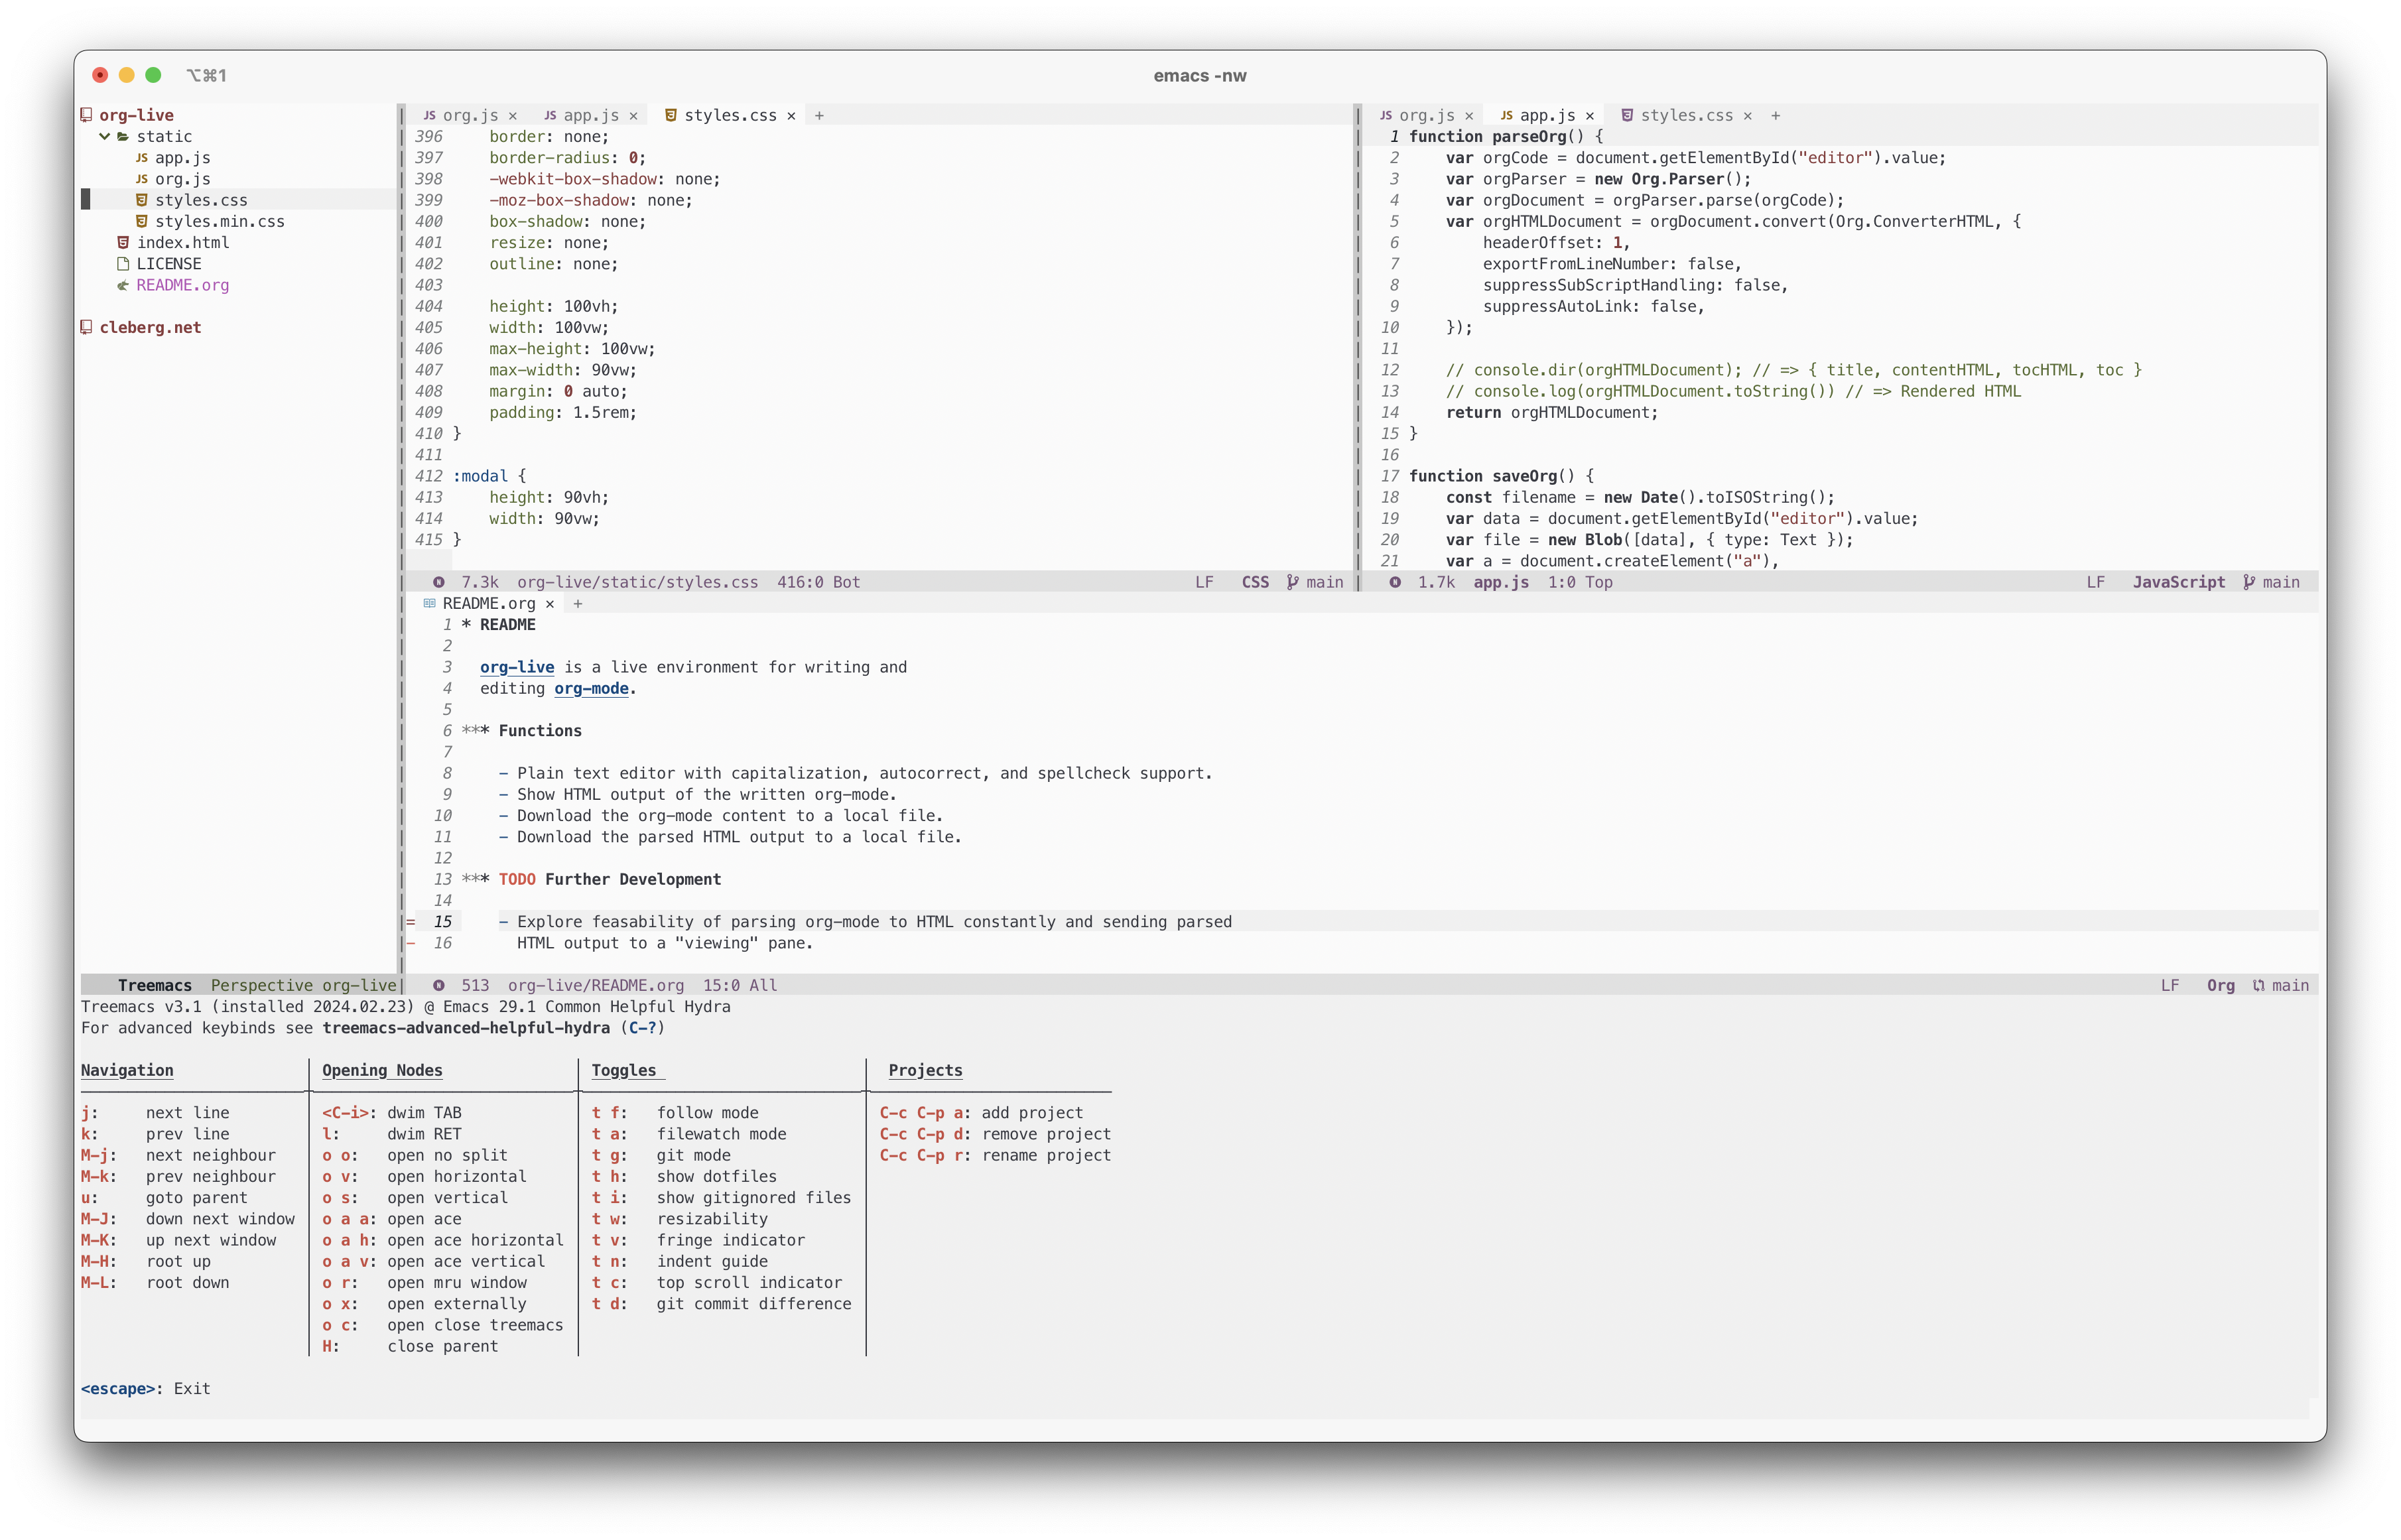 + +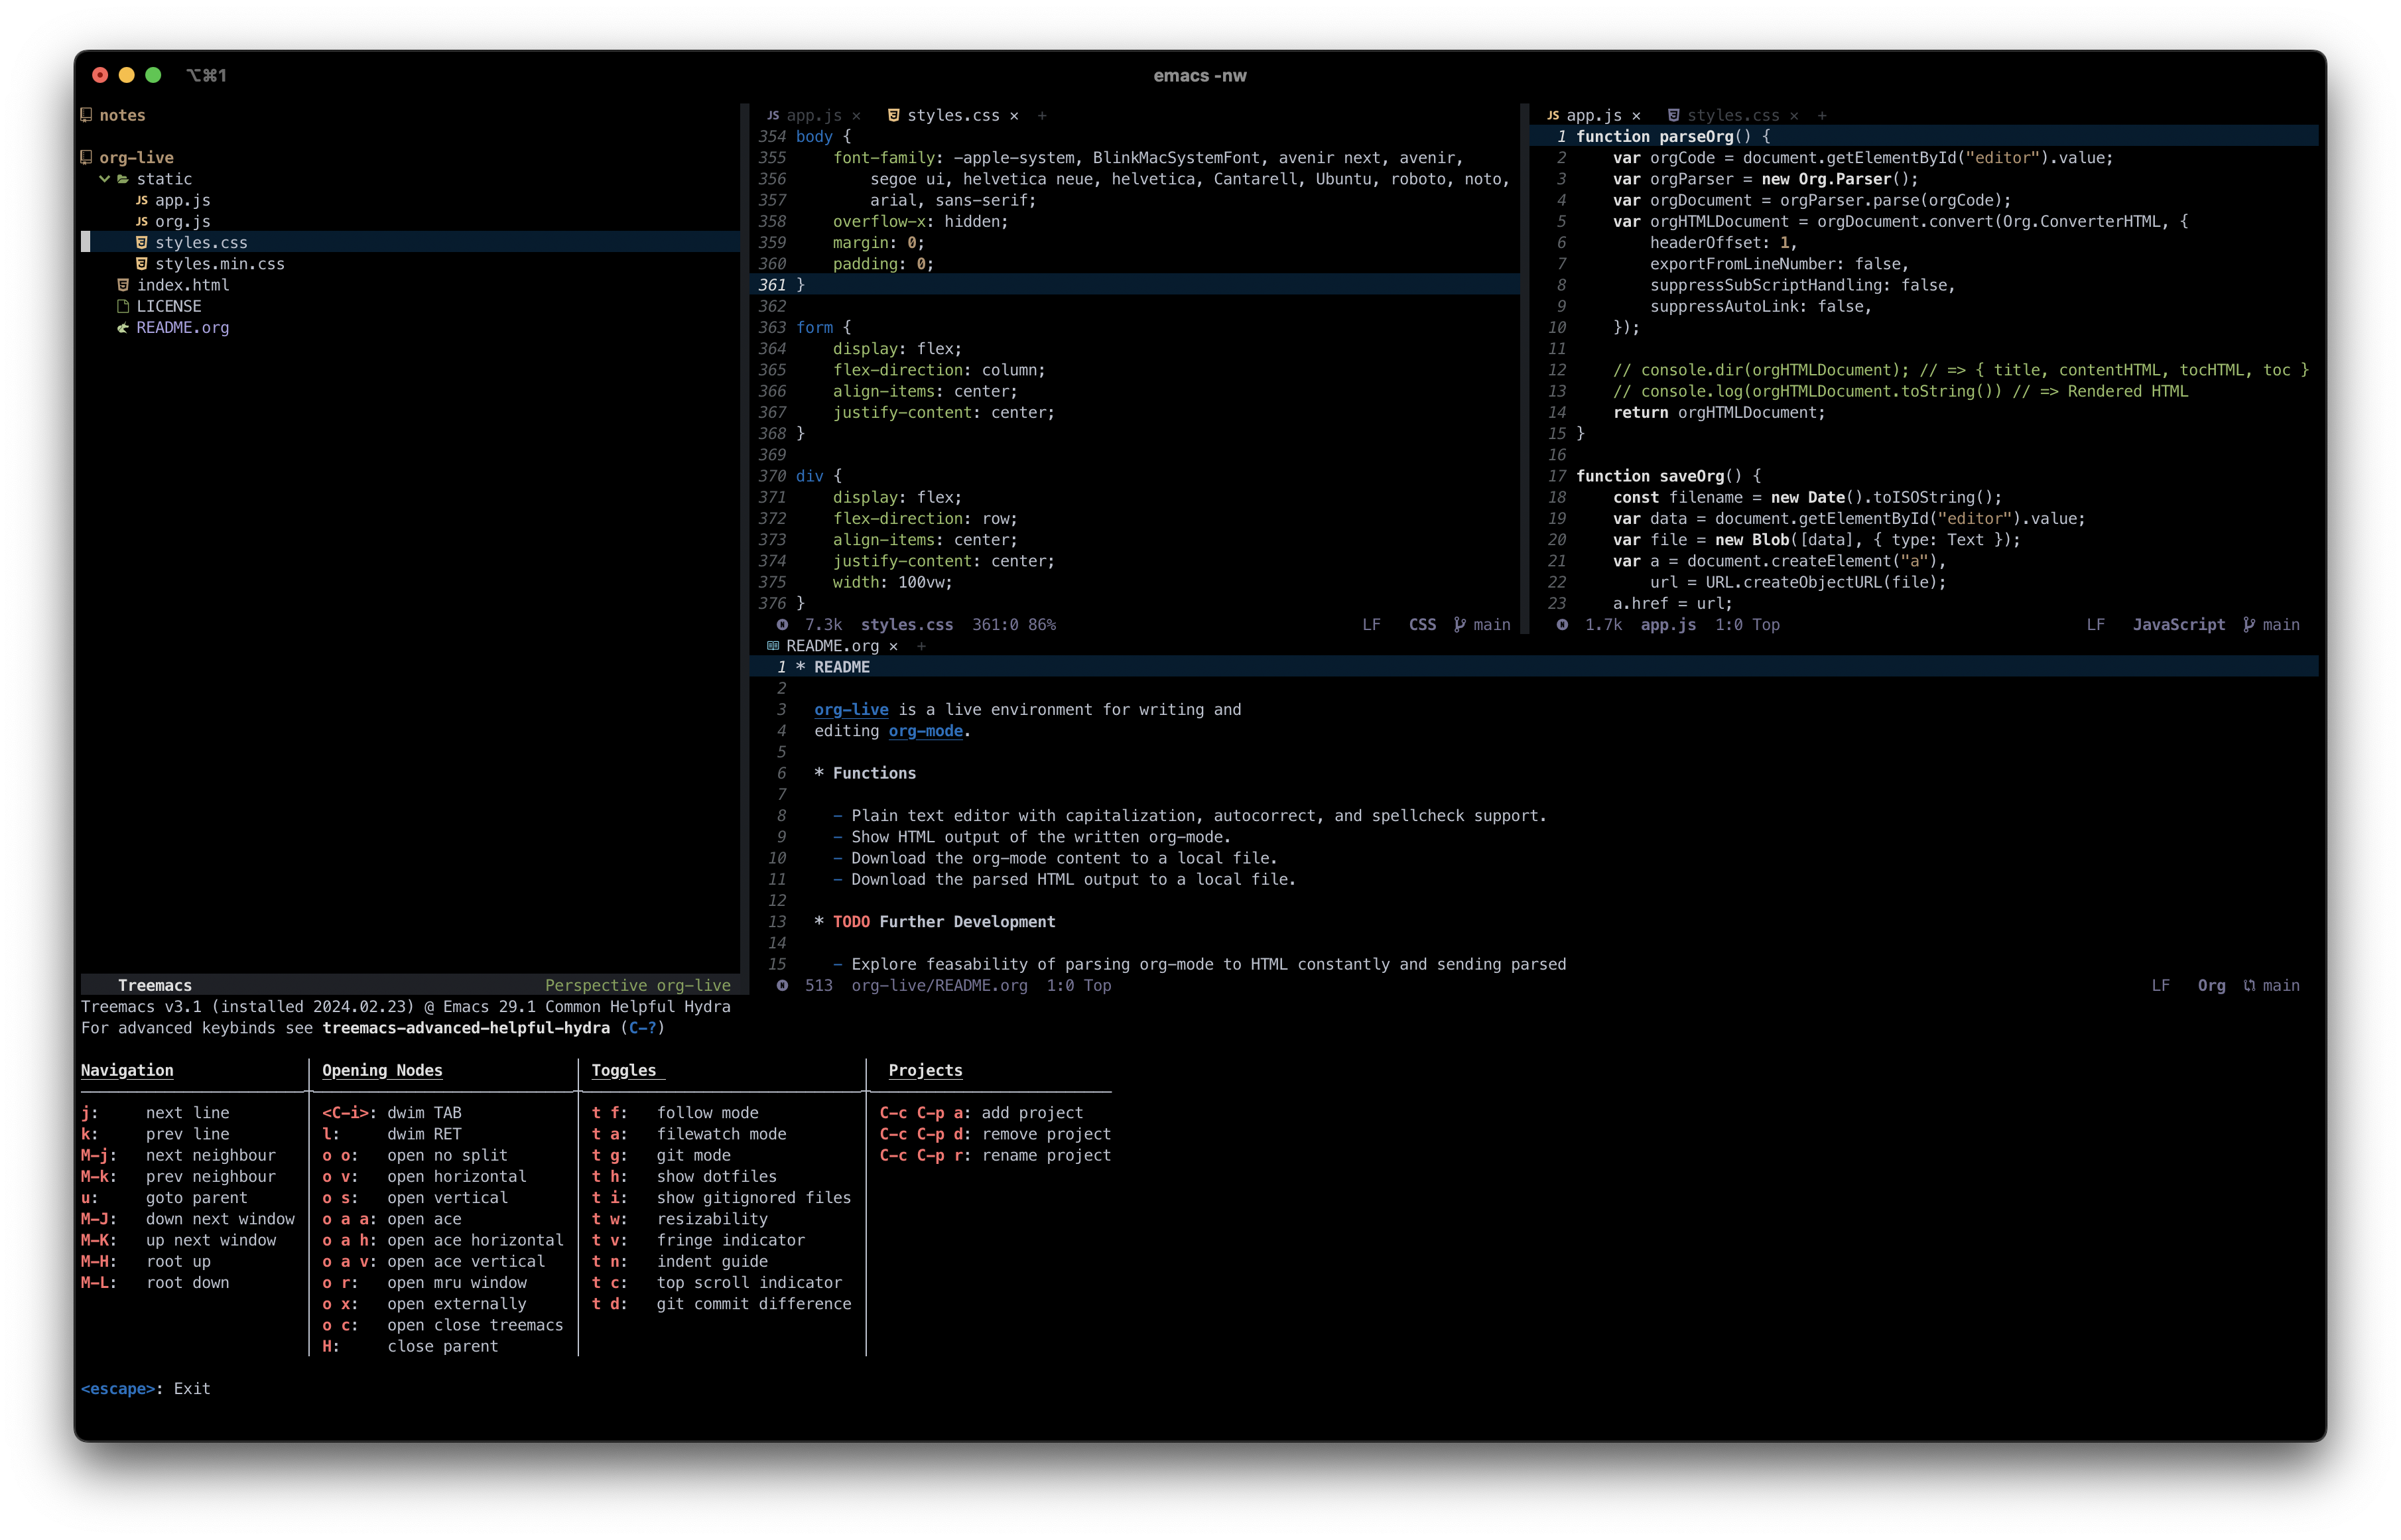 + +## Getting Started + +I have been switching back and forth between +[markdown](https://en.wikipedia.org/wiki/Markdown) and +[org-mode](https://en.wikipedia.org/wiki/Org-mode) recently for my personal note +taking, wiki, and even this blog. As a result, I have been stumbling further +into the world of Emacs and found myself at a point where I now prefer to do +most of my basic editing within Emacs. + +I'll leave the markdown vs. org-mode debate for another post, but I love +org-mode's extensibility and interactive nature within Emacs, but it becomes +very unwieldy in any other client implementation of org-mode - especially on +iOS. On the flip side, markdown is limited in functionality and fractured into +different standards, but it's simple and popular enough that there are a +plethora of great clients to choose from that will get the job done. + +For now, I want to focus on how I have been using Emacs and some of the things +that would have helped me learn it faster had I known where to start. + +### Installation + +This post focuses on [Doom Emacs](https://github.com/doomemacs/doomemacs), which +is an Emacs framework that provides an alternative experience to the vanilla +[GNU Emacs](https://www.gnu.org/software/emacs/). + +The [Getting Start +Guide](https://github.com/doomemacs/doomemacs/blob/master/docs/getting_started.org) +has an extremely detailed walkthrough of installation for all systems, so please +refer to that guide for up-to-date instructions. + +I chose to install on macOS, using the Homebrew option with the +`railwaycat/emacsmacport` version of Emacs. + +Once the program is installed, you can run the program by typing `emacs` in a +terminal. If you installed a version of Emacs that supports both a GUI and TUI, +you will have to run `emacs -nw` to get the TUI instead of the default GUI. + +### Configuration + +Once installed, you can configure Doom by editing the files within the +`~/.doom.d/` directory. This directory holds four files: + +1. `config.el` - Personal configuration file +2. `custom.el` - Custom set variables +3. `init.el` - Doom modules and load order, must run `doom sync` after modifying +4. `packages.el` - Declare packages to install in this file, then run `doom + sync` to install + +I only needed a few customizations for my configuration, so I'll list them +below. + +```lisp +;; ~/.doom.d/config.el +(setq doom-theme 'doom-homage-black) +(setq display-line-numbers-type t) +(setq org-directory "~/Documents/Notes/") + +;; lengthy org-publish directives at the bottom of the file +``` + +```lisp +;; ~/.doom.d/init.el +(doom! :input + :completion + company ; the ultimate code completion backend + vertico ; the search engine of the future + + :ui + doom ; what makes DOOM look the way it does + doom-dashboard ; a nifty splash screen for Emacs + (emoji +unicode) ; 🙂 + hl-todo ; highlight TODO/FIXME/NOTE/DEPRECATED/HACK/REVIEW + minimap ; show a map of the code on the side + modeline ; snazzy, Atom-inspired modeline, plus API + ophints ; highlight the region an operation acts on + (popup +defaults) ; tame sudden yet inevitable temporary windows + tabs ; a tab bar for Emacs + treemacs ; a project drawer, like neotree but cooler + (vc-gutter +pretty) ; vcs diff in the fringe + vi-tilde-fringe ; fringe tildes to mark beyond EOB + workspaces ; tab emulation, persistence & separate workspaces + + :editor + (evil +everywhere); come to the dark side, we have cookies + file-templates ; auto-snippets for empty files + fold ; (nigh) universal code folding + snippets ; my elves. They type so I don't have to + + :emacs + dired ; making dired pretty [functional] + electric ; smarter, keyword-based electric-indent + undo ; persistent, smarter undo for your inevitable mistakes + vc ; version-control and Emacs, sitting in a tree + + :term + term ; basic terminal emulator for Emacs + + :checkers + syntax ; tasing you for every semicolon you forget + + :tools + (eval +overlay) ; run code, run (also, repls) + lookup ; navigate your code and its documentation + magit ; a git porcelain for Emacs + + :os + (:if (featurep :system 'macos) macos) ; improve compatibility with macOS + + :lang + common-lisp ; if you've seen one lisp, you've seen them all + emacs-lisp ; drown in parentheses + markdown ; writing docs for people to ignore + org ; organize your plain life in plain text + python ; beautiful is better than ugly + sh ; she sells {ba,z,fi}sh shells on the C xor + + :app + irc ; how neckbeards socialize + (rss +org) ; emacs as an RSS reader + + (default +bindings +smartparens)) +``` + +If you're editing these files within Doom directly, remember to run `SPC h r r` +to reload the configuration. Also remember to run `doom sync` for any changes to +the `init.el` or `packages.el` files. + +## Basic Functionality + +I kept a cheat sheet note open at first with all of the basic functions typed +out, copied as I went through the tutorial. After a little while, I no longer +needed it. I highly recommend writing down the most applicable shortcuts for +your preferred functionality and refer back to it until you've memorized it. + +Memorizing the shortcuts will differ based on the type of Emacs framework being +used. Personally, migrating from vanilla Emacs to Doom Emacs simplified +everything by a large factor and instantly enabled me to start working on my +projects, eliminating most of the hurdles I was running into. The vanilla emacs +hotkeys became obnoxious and I actually stopped using Emacs entirely for about a +month before trying Doom. + +For me, the first logical step is to interact with the local filesystem. To do +this, I needed to know how to open directories, open files, save files, discard +changes, close files, and switch between open files. Here are some example +shortcuts I've written down in order to accomplish file-based actions. + +| Doom Hotkey | Emacs Hotkey | Description | +|-----------------|--------------|----------------------------------------| +| `SPC :` | `C-x` | Run functions | +| `SPC f f` | `C-x f` | Open file in buffer | +| `SPC f d` | `C-x d` | Open directory with `dired` | +| `i` | `C-x C-q` | Edit current buffer (insert mode) | +| `q` | `C-x C-q` | Quit out of insert mode | +| `SPC f s` | `C-x s` | Save current buffer | +| `SPC b k` | `C-x k` | Kill current buffer | +| `SPC w h/j/k/l` | `C-x o`[^1] | Move left/down/up/right to next buffer | + +[^1] Doom's evil-window functionality is a bit different from GNU Emacs, but you +can always switch to the "other" buffer with `C-x o` or `C-x b` to get a list of +buffers to select. + +In general, when in Doom, you can press `SPC` and wait a second for the help +pane to appear with all available hotkey options. For example, you can press +`SPC`, wait for the help pane, and then select a key such as `g` to enter the +git help pane and explore further command options. + +## Editing + +Next in my process is to dive into editing for any languages I'm currently +using. In this post, I will just cover Markdown and Org-Mode but I have also +been slowly adoping some Python and general web dev tools as well. + +### Markdown + +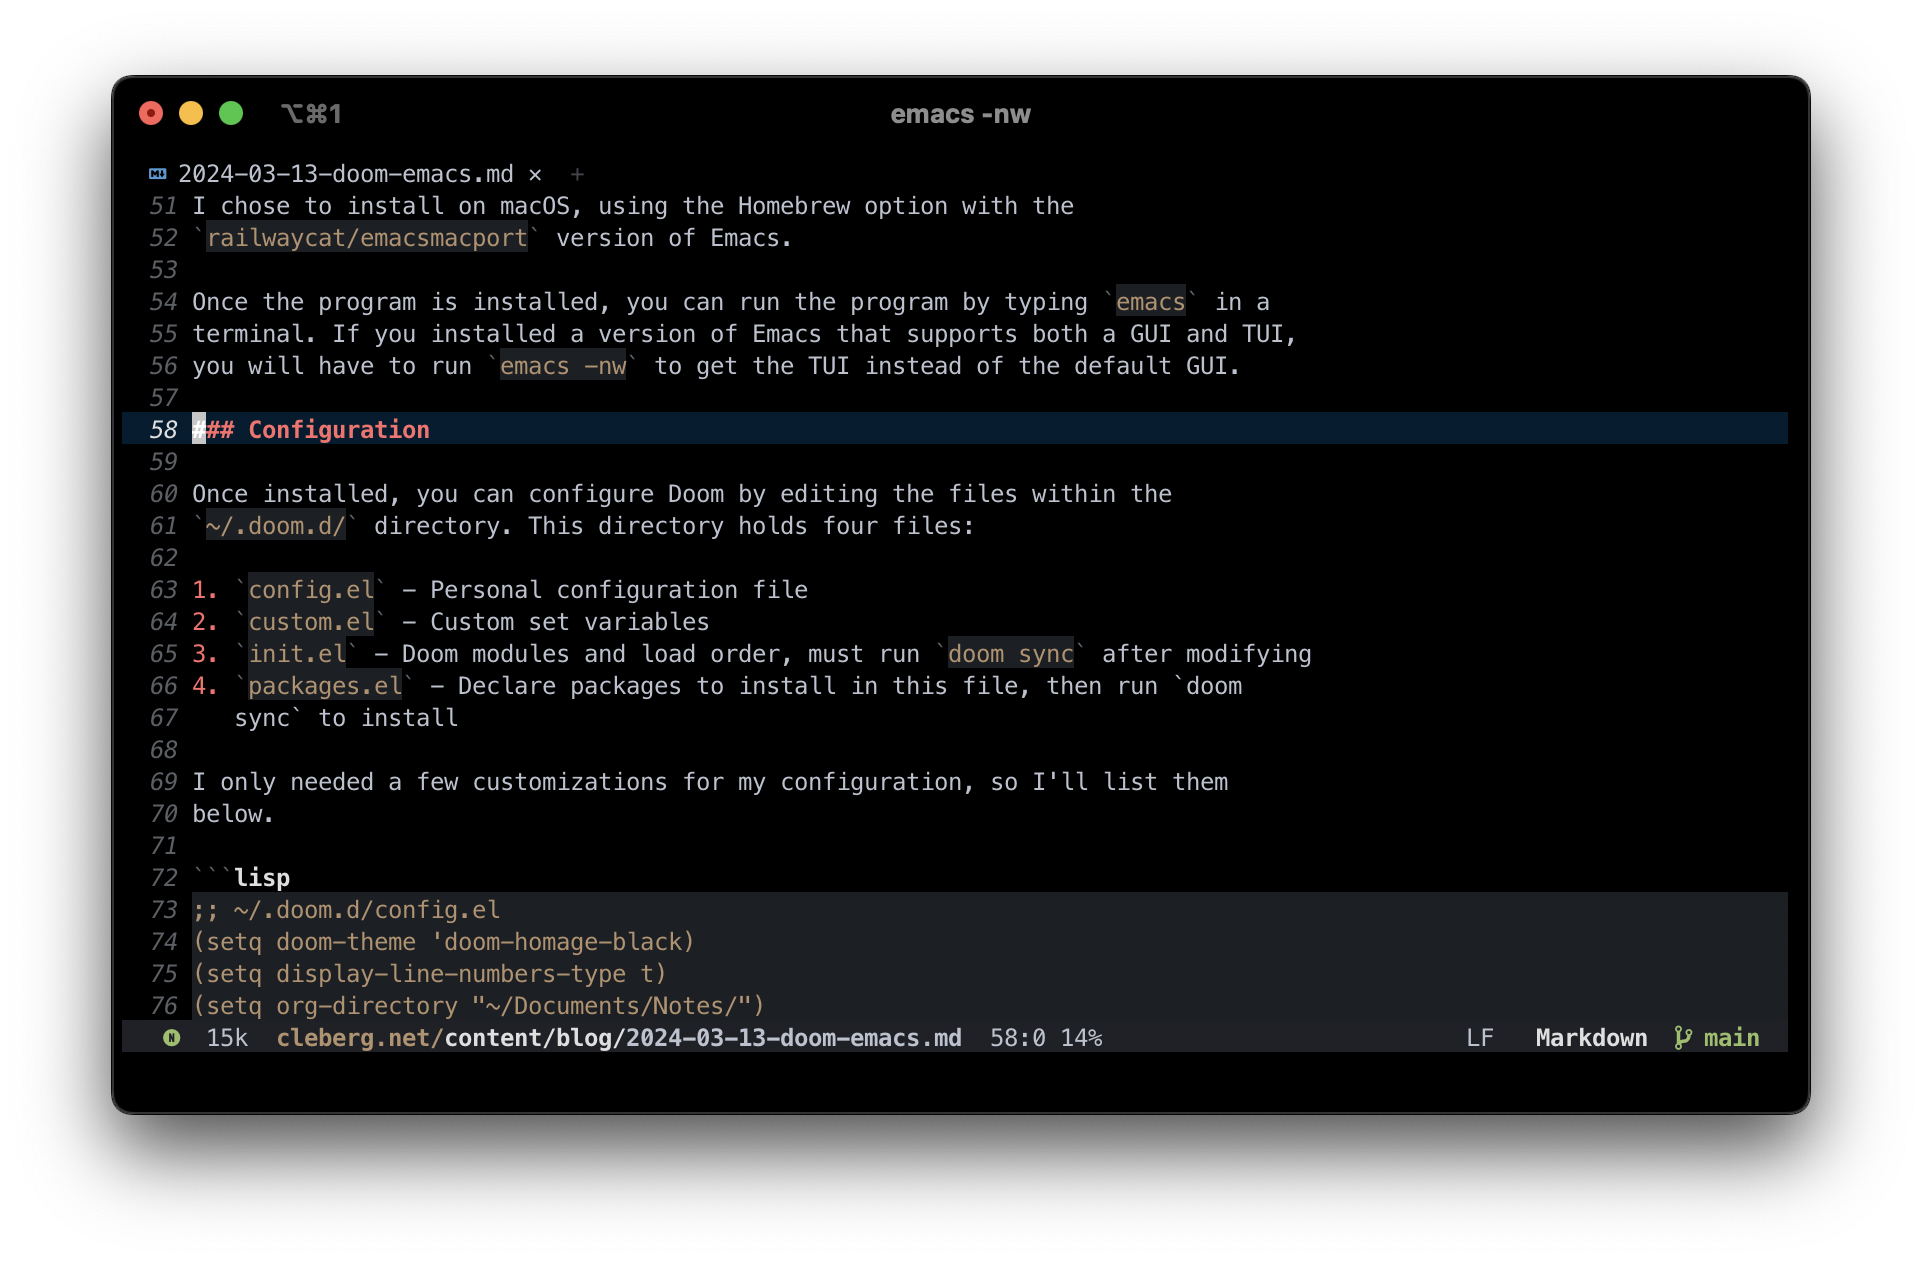 + +Markdown is fairly simple as the syntax is limited, so just make sure the +`~/.doom.d/init.el` includes the `markdown` declaration in the `:lang` section. + +This package includes the following hotkey menus. The insert and toggle menu +expands further, allowing you to insert various markdown elements and toggle +things like link hiding. + +| Doom Hotkey | Function | +|------------------------------|--------------------------| +| `SPC m '` | markdown-edit-code-block | +| `SPC m e` | markdown-export | +| `SPC m i` | +insert | +| `SPC m o` | markdown-open | +| `SPC m p` | markdown-preview | +| `SPC m t` | +toggle | +| `SPC : markdown-table-align` | markdown-table-align | + +### Org-Mode + +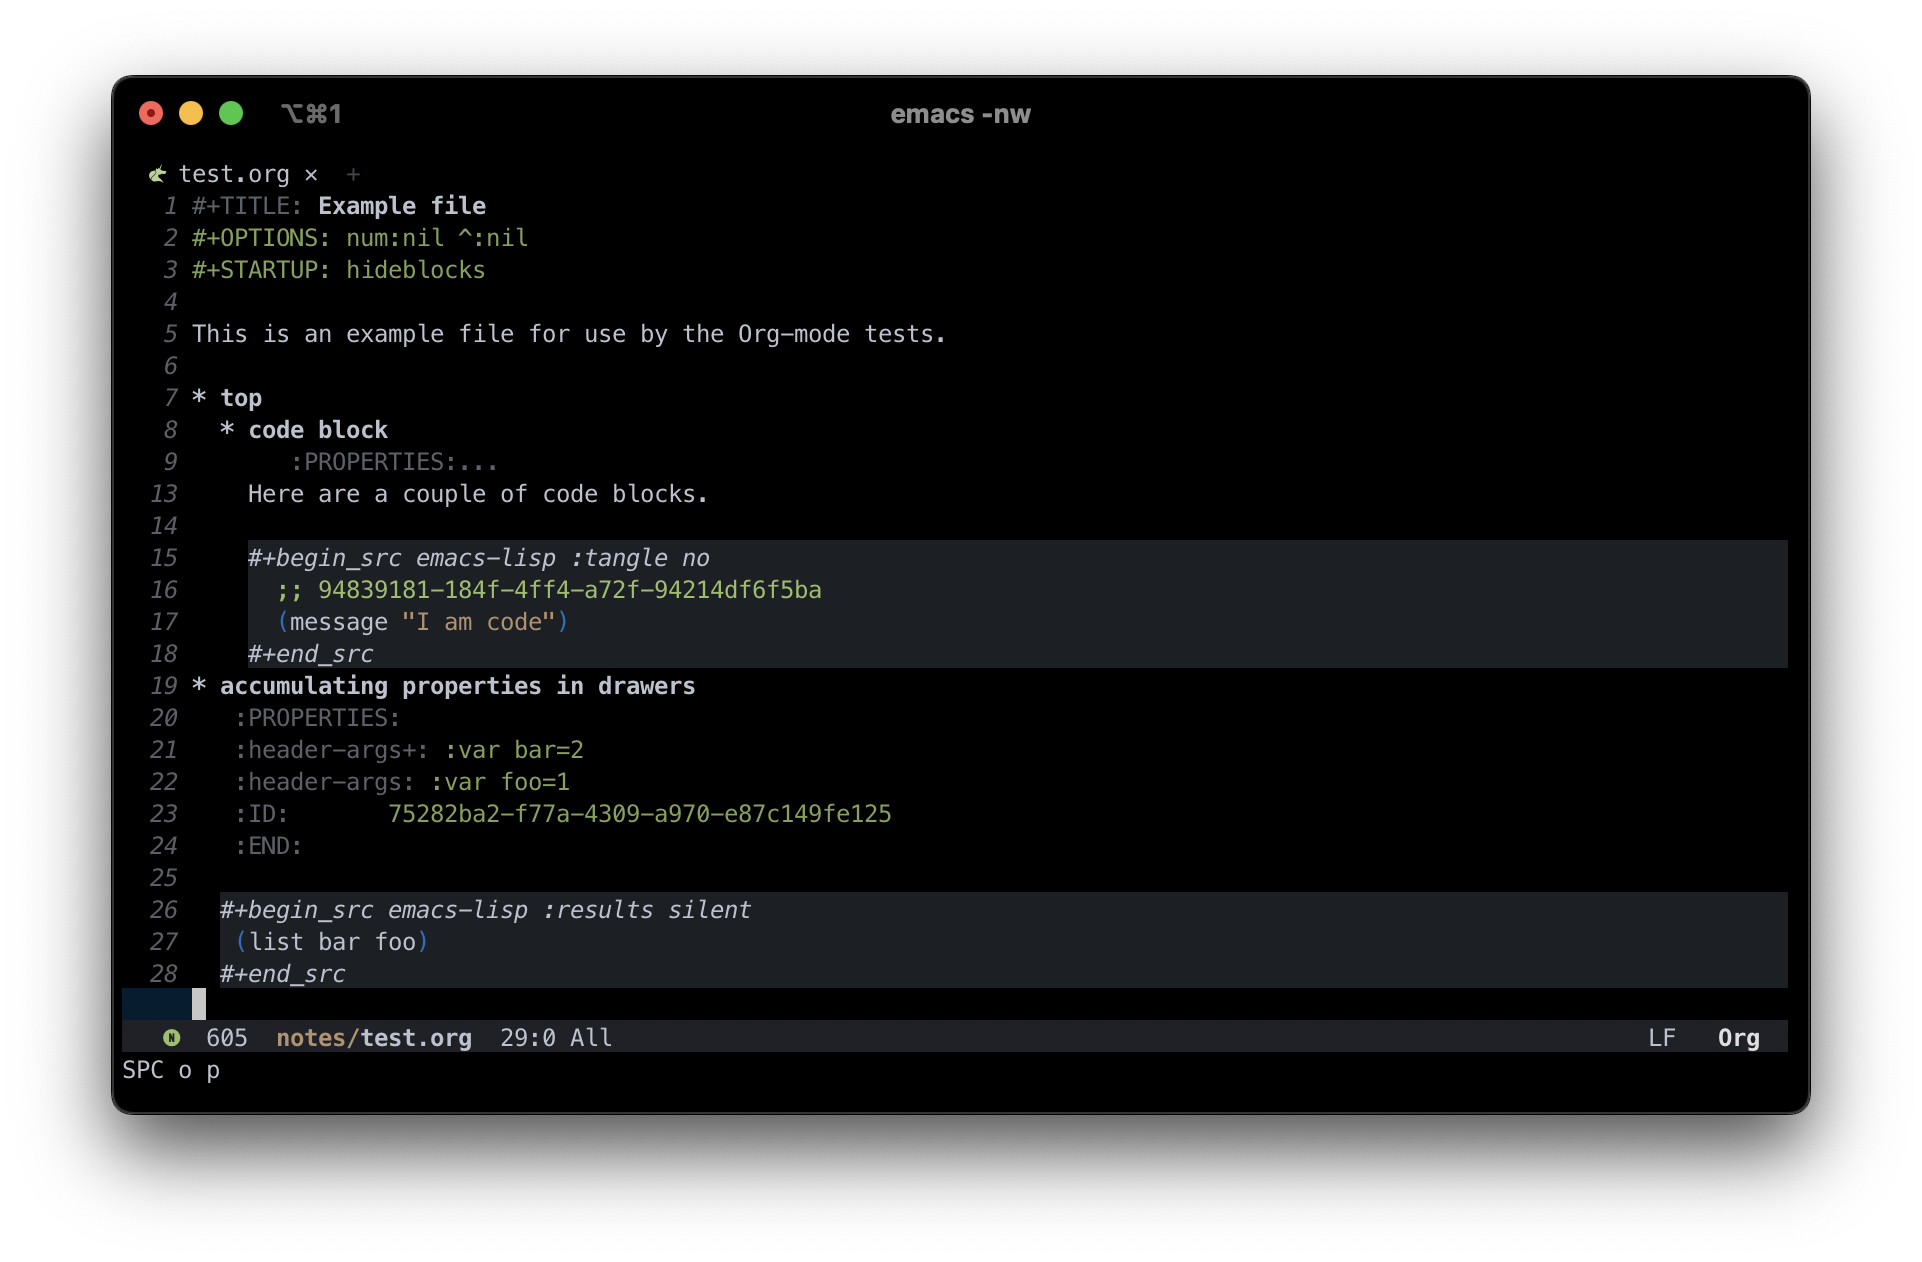 + +Similar to the markdown section above, ensure that the `~/.doom.d/init.el` +includes the `org` declaration in the `:lang` section. + +There are a few hot keys, but a quick search with `SPC : org` shows that there +are 865 possible org-related functions you can run. I won't possibly be able to +list them all, so I will simply cover a few of the basic commands I use myself. + +| Doom Hotkey | Function | +|----------------|---------------------------------------| +| `SPC m t` | org-todo | +| `SPC n t` | org-todo-list | +| `SPC o A` | org-agenda | +| `SPC X` | org-capture | +| `SPC m p p` | org-priority | +| `SPC m d s` | org-schedule | +| `TAB` | org-cycle | +| `SHIFT TAB` | Collapse/open all headings in buffer | +| `M-q` | Format/wrap current section | +| `M-Left/Right` | Demote/promote current heading | +| `M-Down/Up` | Shift current heading section down/up | + +#### Org-Publish + +Org includes a [publishing management +system](https://orgmode.org/manual/Publishing.html) by default that allows you +to export org files to Org, iCalendar, HTML, LaTex, Markdown, ODT, and Plain +Text. Most of these can be exported into another buffer and opened, or simply to +an external file. + +While inside an org file, simply run `SPC m e` or `M-x org-export-dispatch` to +open the export menu. This menu will show all options and ask you to select an +option. If you want to export to HTML, simply press `h` and then `H` (As HTML +buffer), `h` (As HTML file), or `o` (As HTML file and open). + +#### Projects + +Some publishing options are easier with a defined project in Emacs. To create a +project within Emacs, I use two methods: + +1. Add the project via the projectile command `SPC p a`. Does not always work + for me. +2. Add an empty `.projectile` file in the project root. + +Once a project has been created, you can create custom publishing actions within +your `~/.doom.d/config.el` file. For example, here's a test project I created to +try and convert this blog to org-mode recently. + +```lisp +;; org-publish +(require 'ox-publish) + +(defun my/org-sitemap-date-entry-format (entry style project) "Format ENTRY in + org-publish PROJECT Sitemap format ENTRY ENTRY STYLE format that includes + date." (let ((filename (org-publish-find-title entry project))) (if (= (length + filename) 0) (format "*%s*" entry) (format "{{{timestamp(%s)}}} + [[file:%s][%s]]" (format-time-string "%Y-%m-%d" (org-publish-find-date entry + project)) entry filename)))) + +(setq org-export-global-macros '(("timestamp" . "@@html:<time datetime='[$1]' + class='timestamp'>[$1]</time>@@"))) + +(setq org-publish-project-alist + `(("blog" + :base-directory "~/Source/cleberg.net/" + :base-extension "org" + :recursive t + :publishing-directory "~/Source/cleberg.net/public/" + :publishing-function org-html-publish-to-html + ;; HTML5 + :html-doctype "html5" + :html-html5-fancy t + ;; Disable some Org's HTML defaults + :html-head-include-scripts nil + :html-head-include-default-style nil + :section-numbers nil + :with-title nil + ;; Sitemap + :auto-sitemap t + :sitemap-title: "Sitemap" + :sitemap-sort-files anti-chronologically + ; :sitemap-function my/org-sitemap-date-entry-format + ;; Customize HTML output + :html-divs ((preamble "header" "preamble") + (content "main" "content") + (postamble "footer" "postamble")) + :html-head "<meta name='theme-color' content='#111' media='(prefers-color-scheme: dark)'> + <meta name='theme-color' content='#fff' media='(prefers-color-scheme: light)'> + <link rel='stylesheet' href='/syntax-theme-dark.css' media='(prefers-color-scheme: dark)'> + <link rel='stylesheet' href='/syntax-theme-light.css' media='(prefers-color-scheme: light)'> + <link rel='stylesheet' href='/styles.css' type='text/css'>" + :html-preamble "<nav class='site-nav' aria-label='site-nav' role='navigation'> + <ul> + <li><a href='/'>Home</a></li> + <li><a href='/blog/'>Blog</a></li> + <li><a href='/services/'>Services</a></li> + <li><a href='/wiki/'>Wiki</a></li> + </ul></nav> + <h1>%t</h1> + <time datetime='%d'>%d</time>" + :html-postamble " + <p>Last build: %T</p> + <p>Created with %c</p>" + ) + + ("static" + :base-directory "~/Source/cleberg.net/static/" + :base-extension "css\\|txt\\|jpg\\|gif\\|png" + :recursive t + :publishing-directory "~/Source/cleberg.net/public/" + :publishing-function org-publish-attachment) + + ("cleberg.net" :components ("blog" "static")))) +``` + +## General Thoughts + +I have enjoyed Doom Emacs (far more than GNU Emacs) and will likely continue to +use it as my main editor for the time being. Org-Mode is certainly the largest +factor here, as I far prefer it over Markdown due to its inherent features and +detailed markup options. However, working with org-mode on iOS has been a pain +and I will have to see if there's an easier way to resolve those issues or if +going back to separate Markdown, Reminders, and Calendar apps is easier to work +with than an all-in-one org solution. diff --git a/content/blog/2024-03-15-self-hosting-ddns-updater.md b/content/blog/2024-03-15-self-hosting-ddns-updater.md new file mode 100644 index 0000000..7836563 --- /dev/null +++ b/content/blog/2024-03-15-self-hosting-ddns-updater.md @@ -0,0 +1,309 @@ ++++ +date = 2024-03-15T14:49:59+00:00 +title = "Self-Hosting DDNS Updater" +description = "A guide to self-hosting the DDNS Updater container." ++++ + +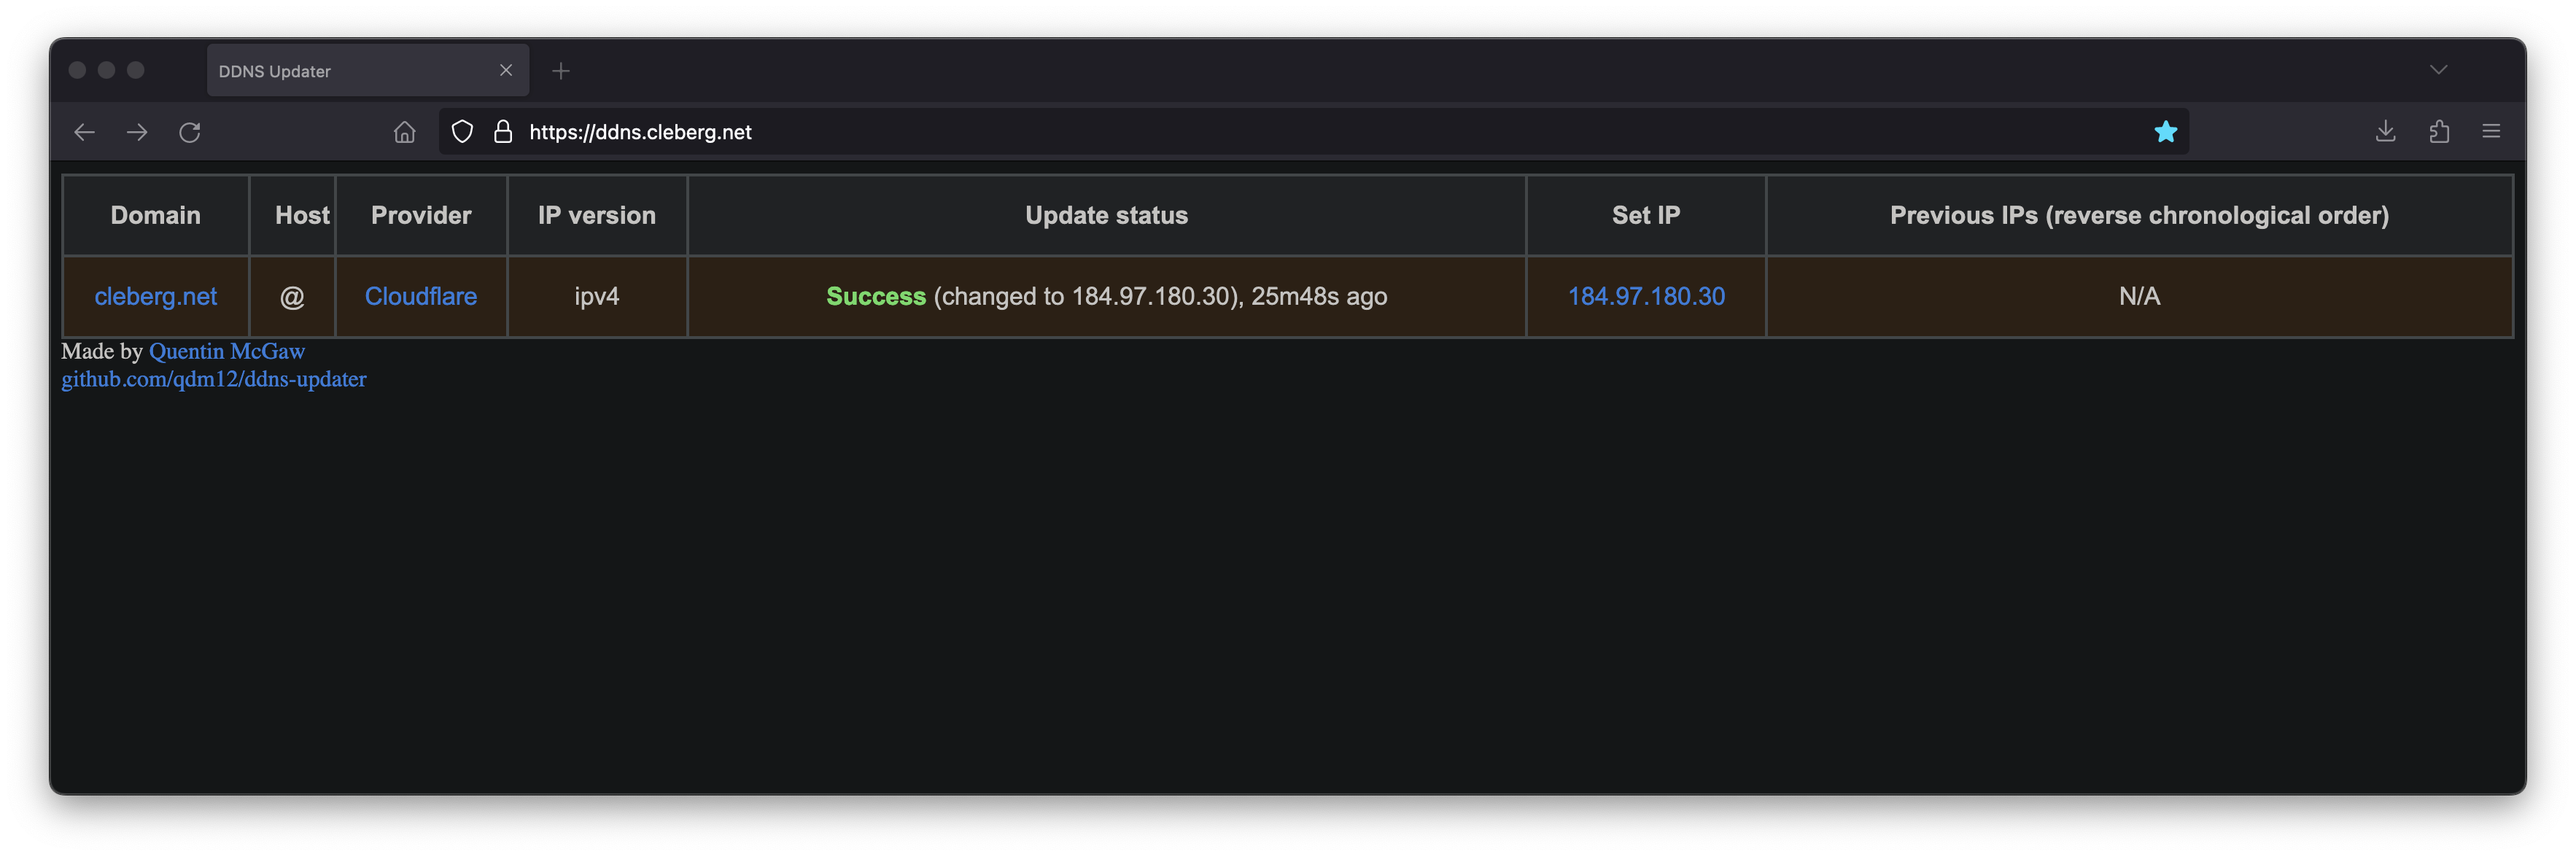 + +[DDNS Updater](https://github.com/qdm12/ddns-updater) is a program to keep DNS A +and/or AAAA records updated for multiple DNS providers. + +If you've read any of my other posts, you'll notice that I have been searching +for and using a few different DDNS updating solutions for years. You'll also +notice that I love any projects that offer a Docker Compose solution. + +Luckily, DDNS Upater fits both of these preferences. + +## Installation + +To get started, always make sure to review the project's +[README](https://github.com/qdm12/ddns-updater/blob/master/README.md). I'll be +documenting my steps below, but they may have changed by the time you read this. + +The first step is to set up the directories and files required for the project. + +```sh +mkdir ~/ddns-updater +mkdir ~/ddns-updater/data +touch ~/ddns-updater/data/config.json +``` + +### Configuration + +The main configuration you need to update is the `data/config.json` file. There +is a large list of supported providers in the README, but I'm going to use +Cloudflare in this example. + +```sh +nano ~/ddns-updater/data/config.json +``` + +When setting up the configuration for Cloudflare, you'll need the following: + +- Required Parameters + - `"zone_identifier"` is the Zone ID of your site from the domain overview + page + - `"host"` is your host and can be `"@"`, a subdomain or the wildcard `"*"`. + See [this issue comment for + context](https://github.com/qdm12/ddns-updater/issues/243#issuecomment-928313949). + - `"ttl"` integer value for record TTL in seconds (specify 1 for automatic) + - One of the following ([how to find API + keys](https://developers.cloudflare.com/fundamentals/api/get-started/)): + - Email `"email"` and Global API Key `"key"` + - User service key `"user_service_key"` + - API Token `"token"`, configured with DNS edit permissions for your DNS + name's zone +- Optional Parameters + - `"proxied"` can be set to `true` to use the proxy services of Cloudflare + - `"ip_version"` can be `ipv4` (A records), or `ipv6` (AAAA records) or `ipv4 + or ipv6` (update one of the two, depending on the public ip found). It + defaults to `ipv4 or ipv6`. + - `"ipv6_suffix"` is the IPv6 interface identifier suffix to use. It can be + for example `0:0:0:0:72ad:8fbb:a54e:bedd/64`. If left empty, it defaults to + no suffix and the raw public IPv6 address obtained is used in the record + updating. + +```conf +{ + "settings": [ + { + "provider": "cloudflare", + "zone_identifier": "some id", + "domain": "domain.com", + "host": "@", + "ttl": 1, + "proxied": true, + "token": "yourtoken", + "ip_version": "ipv4", + "ipv6_suffix": "" + } + ] +} +``` + +Once you have configured the provider of your choice, correct the file and +directory permissions and ownership. + +```sh +cd ~/ddns_updater +# Owned by user ID of Docker container (1000) +chown -R 1000 data +# all access (for creating json database file data/updates.json) +chmod 700 data +# read access only +chmod 400 data/config.json +``` + +### Docker Compose + +After creating the project structure, let's create the `docker-compose.yml` +file. + +```sh +nano ~/ddns_-pdater/docker-compose.yml +``` + +```config +version: "3.7" +services: + ddns-updater: + image: qmcgaw/ddns-updater + container_name: ddns-updater + network_mode: bridge + ports: + - 8097:8000/tcp # Change the 8097 value to whichever port you want to use + volumes: + - ./data:/updater/data + environment: + - CONFIG= + - PERIOD=5m + - UPDATE_COOLDOWN_PERIOD=5m + - PUBLICIP_FETCHERS=all + - PUBLICIP_HTTP_PROVIDERS=all + - PUBLICIPV4_HTTP_PROVIDERS=all + - PUBLICIPV6_HTTP_PROVIDERS=all + - PUBLICIP_DNS_PROVIDERS=all + - PUBLICIP_DNS_TIMEOUT=3s + - HTTP_TIMEOUT=10s + + # Web UI + - LISTENING_ADDRESS=:8000 + - ROOT_URL=/ + + # Backup + - BACKUP_PERIOD=0 # 0 to disable + - BACKUP_DIRECTORY=/updater/data + + # Other + - LOG_LEVEL=info + - LOG_CALLER=hidden + - SHOUTRRR_ADDRESSES= + restart: always +``` + +After configuring your preferences in the `docker-compose.yml`, launch the +container. + +```sh +cd ~/ddns-updater +sudo docker-compose up -d +``` + +If you've launched this on your local machine, you can launch `localhost:8097` +in your browser to see the results. + +### Nginx Reverse Proxy + +If you launched this service on a server, other machine, or just want to access +it remotely via a domain name, you can use Nginx as a reverse proxy to expose +the service publicly. + +Start by creating the Nginx configuration file. + +```sh +sudo nano /etc/nginx/sites-available/ddns +``` + +Here's a basic example that should work properly. + +```conf +server { + # If using 443, remember to include your ssl_certificate + # and ssl_certificate_key + listen [::]:80; + listen 80; + server_name ddns.example.com; + + location / { + set $upstream_ao http://127.0.0.1:9380; + proxy_pass $upstream_ao; + + # May need some additional proxy_* parameters, + # see the full example below if necessary + } +} +``` + +Here's a full example that uses my Authelia authentication service to require +authentication before someone can access the web page. + +```conf +server { + if ($host ~ ^[^.]+\.example\.com$) { + return 301 https://$host$request_uri; + } + + listen [::]:80; + listen 80; + server_name ddns.example.com; + return 404; +} + +server { + listen [::]:443 ssl http2; + listen 443 ssl http2; + server_name ddns.example.com; + access_log /var/log/nginx/ddns.access.log; + error_log /var/log/nginx/ddns.error.log; + + add_header X-Content-Type-Options "nosniff"; + add_header X-XSS-Protection "1; mode=block"; + add_header X-Frame-Options "DENY"; + add_header Strict-Transport-Security "max-age=63072000; includeSubDomains"; + add_header Referrer-Policy "no-referrer"; + + ssl_certificate /etc/letsencrypt/live/example.com/fullchain.pem; + ssl_certificate_key /etc/letsencrypt/live/example.com/privkey.pem; + include /etc/letsencrypt/options-ssl-nginx.conf; + ssl_dhparam /etc/letsencrypt/ssl-dhparams.pem; + + location /authelia { + internal; + set $upstream_authelia http://127.0.0.1:9091/api/verify; #change the IP and Port to match the IP and Port of your Authelia container + proxy_pass_request_body off; + proxy_pass $upstream_authelia; + proxy_set_header Content-Length ""; + + # Timeout if the real server is dead + proxy_next_upstream error timeout invalid_header http_500 http_502 http_503; + client_body_buffer_size 128k; + proxy_set_header Host $host; + proxy_set_header X-Original-URL $scheme://$http_host$request_uri; + proxy_set_header X-Real-IP $remote_addr; + proxy_set_header X-Forwarded-For $remote_addr; + proxy_set_header X-Forwarded-Proto $scheme; + proxy_set_header X-Forwarded-Host $http_host; + proxy_set_header X-Forwarded-Uri $request_uri; + proxy_set_header X-Forwarded-Ssl on; + proxy_redirect http:// $scheme://; + proxy_http_version 1.1; + proxy_set_header Connection ""; + proxy_cache_bypass $cookie_session; + proxy_no_cache $cookie_session; + proxy_buffers 4 32k; + + send_timeout 5m; + proxy_read_timeout 240; + proxy_send_timeout 240; + proxy_connect_timeout 240; + } + + location / { + set $upstream_ddns http://127.0.0.1:8097; #change ddns to match your container name: $upstream_some-container-name or $upstream_somecontainername + proxy_pass $upstream_ddns; #change ddns to match your container name: $upstream_some-container-name or $upstream_somecontainername + + auth_request /authelia; + auth_request_set $target_url https://$http_host$request_uri; + auth_request_set $user $upstream_http_remote_user; + auth_request_set $email $upstream_http_remote_email; + auth_request_set $groups $upstream_http_remote_groups; + proxy_set_header Remote-User $user; + proxy_set_header Remote-Email $email; + proxy_set_header Remote-Groups $groups; + + error_page 401 =302 https://auth.example.com/?rd=$target_url; #change this to match your authentication domain/subdomain + + client_body_buffer_size 128k; + + proxy_next_upstream error timeout invalid_header http_500 http_502 http_503; + + send_timeout 5m; + proxy_read_timeout 360; + proxy_send_timeout 360; + proxy_connect_timeout 360; + + proxy_set_header Host $host; + proxy_set_header Upgrade $http_upgrade; + proxy_set_header Connection upgrade; + proxy_set_header Accept-Encoding gzip; + proxy_set_header X-Real-IP $remote_addr; + proxy_set_header X-Forwarded-For $proxy_add_x_forwarded_for; + proxy_set_header X-Forwarded-Proto $scheme; + proxy_set_header X-Forwarded-Host $http_host; + proxy_set_header X-Forwarded-Uri $request_uri; + proxy_set_header X-Forwarded-Ssl on; + proxy_redirect http:// $scheme://; + proxy_http_version 1.1; + proxy_set_header Connection ""; + proxy_cache_bypass $cookie_session; + proxy_no_cache $cookie_session; + proxy_buffers 64 256k; + + # set_real_ip_from 192.168.1.0/16; #make sure this matches your network setup + # real_ip_header CF-Connecting-IP; + # real_ip_recursive on; + } +} +``` + +When complete, simply link the file and restart the web server. + +```sh +sudo ln -s /etc/nginx/sites-available/ddns /etc/nginx/sites-enabled/ddns +sudo systemctl restart nginx.service +``` + +Your ddns-updater service will now be available via `ddns.example.com`! + |